

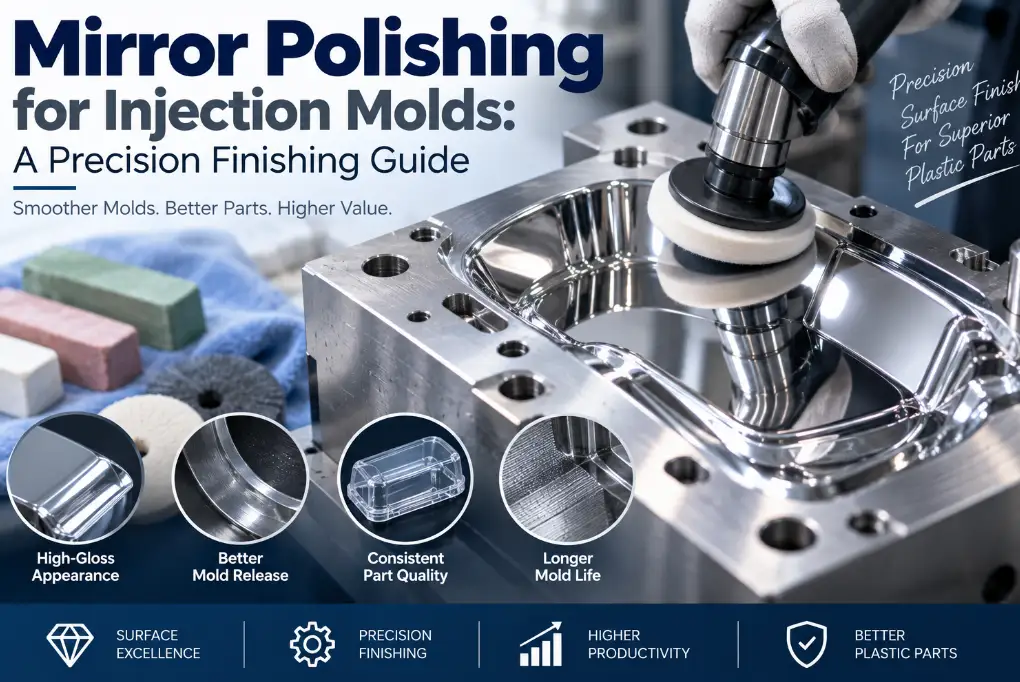
Mirror Polishing for Injection Molds is a critical finishing process that creates ultra-smooth surfaces, improves mold release, enhances part appearance, and supports consistent production quality.
Mirror polishing, also called high-gloss polishing or SPI-A finishing, is a sequential surface refinement process that removes progressively finer layers of material from a hardened mold cavity or core until the surface reaches an optically reflective, near-flawless condition. In injection mold manufacturing, mirror polishing is the final finishing operation applied to cosmetic cavities, optical lens tooling, and any surface where part release, transparency, or visual appearance depends on eliminating every visible tool mark left by prior machining, EDM, or grinding operations.
This guide explains how mirror polishing progresses from coarse stoning through diamond paste and buffing, which mold materials polish most reliably, what finish standards and measurement methods apply, and how to control cost, cycle time, and defect risk when specifying a mirror finish on a mold component drawing.
What Is Mirror Polishing and How Does It Work?
Mirror polishing follows a sequential abrasive progression, starting with the surface left behind by rough machining, EDM, or grinding and working through a series of increasingly fine abrasive stages until surface roughness drops low enough that the surface reflects light specularly rather than diffusely, which is the physical definition of a mirror or optical finish. Each stage in the sequence must remove the scratch pattern left by the previous stage; skipping a grit step or moving too quickly through the progression is the most common reason a polish fails to reach true mirror clarity even after many hours of labor.
The process is almost entirely manual, performed by a skilled polisher using hand stones, polishing sticks, and progressively finer diamond compound applied with felt, wood, or bamboo laps, although rotary and vibratory polishing tools are used to assist with stock removal in the earlier, coarser stages. Because the polisher relies on tactile feedback and visual inspection under strong directional light to judge progress, mirror polishing remains one of the few mold finishing operations that has not been fully automated, and the skill and patience of the individual polisher has a direct, measurable effect on the final result.
Stages of the Mirror Polishing Sequence
A typical mirror polishing sequence for a hardened mold cavity moves through coarse stone work, fine stone work, diamond paste polishing at multiple grit levels, and finally buffing or wheel polishing to bring the surface to its final specular condition. Each stage uses a finer abrasive than the one before it, and the polisher checks the surface under magnification and raking light between stages to confirm the previous scratch pattern has been fully removed before advancing.
SPI Mold Finish Standards for Mirror-Polished Surfaces
| SPI Grade | Abrasive Used | Typical Surface Roughness (Ra) | Common Application |
|---|---|---|---|
| SPI A-1 | Diamond buff, 1 micron | <0.012 µm | Optical lenses, high-clarity transparent parts |
| SPI A-2 | Diamond buff, 3 micron | 0.012–0.025 µm | Cosmetic surfaces requiring high gloss |
| SPI A-3 | Diamond buff, 6 micron | 0.025–0.05 µm | General high-gloss cosmetic cavities |
| SPI B-1 | 600 grit paper | 0.05–0.1 µm | Semi-gloss surfaces, moderate cosmetic requirement |
| SPI C-1 | 600 grit stone | 0.1–0.3 µm | Matte or low-gloss functional surfaces |
Polishing Tools and Equipment
A polisher’s toolkit for mirror finishing typically includes a range of hand stones in progressively finer grits, wooden and bamboo sticks shaped to reach specific cavity contours, felt and leather laps for applying diamond paste, and small rotary or reciprocating power tools fitted with felt bobs or rubber polishing points to assist with the coarser stock-removal stages. Hand-held pneumatic or electric die grinders fitted with mounted stones or abrasive points speed up the initial stoning work on larger, more open cavity areas, while the finest diamond paste stages are almost always applied entirely by hand to maintain the level of control needed to avoid over-polishing a localized area.
Magnification is used throughout the process, typically through a hand-held loupe or a bench-mounted magnifier with adjustable directional lighting, since many of the defects that matter at mirror-finish quality levels, such as fine pitting or a faint residual scratch, are effectively invisible to the naked eye under normal shop lighting. Skilled polishers also rely heavily on touch, running a fingertip or fingernail lightly across a surface to detect irregularities that are difficult to see even under magnification, particularly on curved or contoured cavity surfaces where lighting angles are harder to control.
Why Mirror Polishing Matters for Injection Mold Performance
Surface finish on a mold cavity directly transfers to the molded part, so any residual tool mark, EDM texture, or grinding line on the mold surface will appear as a visible defect on every part produced from that cavity. Mirror polishing is specified whenever a molded part must be optically clear, such as a lens or light guide, or must present a defect-free, high-gloss cosmetic surface, such as an exterior consumer product housing where any visible line or pit would be rejected on sight.
Beyond appearance, surface finish also affects part release and cycle time. A highly polished cavity surface reduces the mechanical friction between the molded part and the steel during ejection, which is particularly important for parts with deep draws, thin walls, or textured undercuts where a rougher surface would increase the risk of sticking, scuffing, or ejector pin push marks. For certain resins and part geometries, a well-polished mold can shorten cycle time slightly by allowing the part to release more consistently at a lower ejection force, reducing the risk of hesitation marks or part distortion during ejection.
Mirror polishing also interacts closely with resin selection and molding process settings in ways that are easy to overlook at the mold design stage. A cavity polished to SPI A-1 will often reveal flow lines, weld lines, or minor gate blush on the molded part more readily than a lower-gloss surface would, simply because the reflective finish makes any underlying flow irregularity easier for the eye to detect. This means a mirror-finished mold sometimes places additional demands on gate location, venting, and process window control to avoid trading one visible defect for another.
Manual Polishing Compared with Machine-Assisted and Electropolishing Methods
While hand polishing with stones and diamond paste remains the standard method for achieving a true SPI A-1 mirror finish, other methods are sometimes used for less demanding finish requirements or to reduce labor time on large, relatively flat surfaces.
Mirror Polishing Methods Compared
| Method | Best Application | Achievable Finish | Relative Labor Time |
|---|---|---|---|
| Manual hand polishing | Complex cavity geometry, optical lens tooling | SPI A-1 achievable | Very high |
| Rotary/vibratory tool-assisted polishing | Larger, more accessible flat or gently curved surfaces | SPI A-2 to A-3 typical | Moderate |
| Electropolishing | Stainless mold steel, complex internal passages | SPI B-1 to A-3 typical | Low labor, but limited to compatible alloys |
| Ultrasonic-assisted polishing | Fine detail areas, hard-to-reach corners | SPI A-2 to A-3 typical | Moderate |
Tip: Reserve true SPI A-1 hand polishing for surfaces where optical clarity or cosmetic perfection is truly required, and specify a lower SPI grade for surfaces the customer will never see, such as internal ribs or non-cosmetic back sides — this keeps polishing labor, and therefore mold cost, proportional to actual functional need.
Where Mirror Polishing Is Used on Injection Mold Components
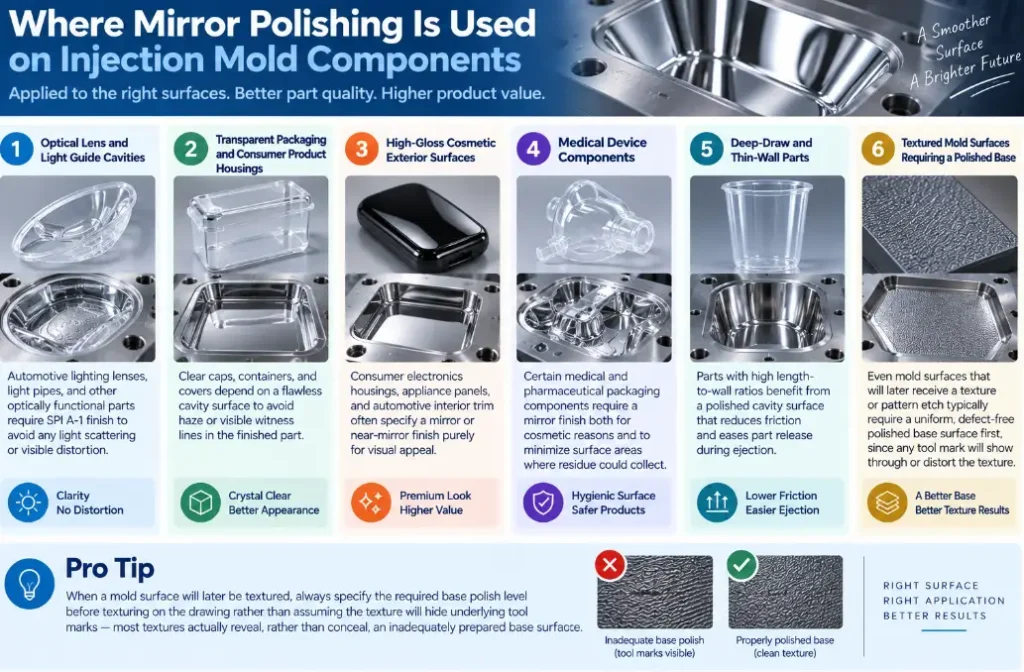
Mirror polishing is applied selectively to specific mold surfaces rather than uniformly across an entire mold, since polishing labor is one of the more time-intensive and costly operations in mold finishing. Deciding which surfaces genuinely require a mirror finish, and which can use a lower SPI grade, is typically one of the earliest and most consequential decisions in the mold design process, since retrofitting a higher polish level onto an already-built mold is far more disruptive than specifying it correctly from the start. The following surfaces and applications most commonly require a true mirror or near-mirror finish.
- Optical lens and light guide cavities — Automotive lighting lenses, light pipes, and other optically functional parts require SPI A-1 finish to avoid any light scattering or visible distortion caused by residual tool marks.
- Transparent packaging and consumer product housings — Clear caps, containers, and covers depend on a flawless cavity surface to avoid haze or visible witness lines in the finished part.
- High-gloss cosmetic exterior surfaces — Consumer electronics housings, appliance panels, and automotive interior trim often specify a mirror or near-mirror finish purely for visual appeal.
- Medical device components — Certain medical and pharmaceutical packaging components require a mirror finish both for cosmetic reasons and to minimize surface areas where residue or contamination could collect.
- Deep-draw and thin-wall parts — Parts with high length-to-wall ratios benefit from a polished cavity surface that reduces friction and eases part release during ejection.
- Textured mold surfaces requiring a polished base — Even mold surfaces that will later receive a texture or pattern etch typically require a uniform, defect-free polished base surface first, since any pre-existing tool mark will show through or distort the applied texture.
Tip: When a mold surface will later be textured, always specify the required base polish level before texturing on the drawing rather than assuming the texture will hide underlying tool marks — most textures actually reveal, rather than conceal, an inadequately prepared base surface.
Abrasive Progression and Diamond Paste Grit Selection
The heart of the mirror polishing process is a carefully sequenced progression through finer and finer abrasive grits, each stage removing the scratch pattern of the one before it. Skipping steps in this progression is the single most common cause of a polish that never reaches true mirror clarity, because a coarser scratch left behind by an earlier stage cannot be removed by a much finer abrasive without excessive, uneven stock removal.
Typical Diamond Paste Grit Progression for Mirror Polishing
| Stage | Abrasive Grit | Approximate Micron Size | Purpose |
|---|---|---|---|
| Coarse stoning | 220–320 grit stone | 40–65 µm | Remove EDM recast or grinding lines |
| Fine stoning | 400–600 grit stone | 15–25 µm | Refine surface, prepare for diamond paste |
| Coarse diamond paste | 15 micron paste | 15 µm | Begin diamond polishing progression |
| Medium diamond paste | 6 micron paste | 6 µm | Reduce scratch depth, build reflectivity |
| Fine diamond paste | 3 micron paste | 3 µm | Approach SPI A-2/A-3 finish level |
| Ultra-fine diamond paste | 1 micron paste | 1 µm | Achieve SPI A-1 mirror finish |
Cleanliness between stages is just as important as the abrasive progression itself. A single stray coarse particle carried over from an earlier stage into a finer polishing step can drag a deep scratch across an otherwise near-perfect surface, undoing significant prior labor. Experienced polishing shops maintain strict separation between coarse and fine polishing areas, use dedicated laps and cloths for each grit level, and clean the workpiece thoroughly between stages to prevent this kind of contamination.
Tip: Never reuse a felt or wood lap across different diamond paste grit levels. Even a small amount of coarser abrasive embedded in a lap can transfer into a finer polishing stage and introduce scratches that require backing up several steps in the progression to correct.
Mold Steel Materials and Their Polishability
Not all mold steels polish equally well, and material selection has a direct effect on how achievable, and how costly, a true mirror finish will be. Steel cleanliness, meaning the absence of hard carbide inclusions and porosity in the material’s microstructure, matters more for polishability than hardness alone, since a hard but “dirty” steel with inconsistent inclusions will polish unevenly and develop pitting no matter how skilled the polisher is.
Mold Steel Polishability for Mirror Finish Applications
| Material | Typical Hardness | Polishability | Common Use |
|---|---|---|---|
| NAK80 pre-hardened steel | 37–41 HRC | Excellent | High-gloss cosmetic and optical cavities |
| S136 stainless mold steel | 48–52 HRC | Very good | Corrosion-resistant, high-polish medical or optical parts |
| P20 pre-hardened steel | 28–32 HRC | Good | General cosmetic cavities, moderate polish grades |
| H13 hot-work tool steel | 48–52 HRC | Fair to good | High-wear cavities requiring moderate gloss |
| 420 stainless steel | 48–54 HRC | Good | Corrosion-resistant cosmetic and medical cavities |
Beyond the base material choice, the polisher’s work is only as good as the steel’s condition entering the polishing stage. Porosity, non-metallic inclusions, or a poorly executed heat treatment cycle can all leave microscopic voids or hard spots that resist uniform abrasive removal, appearing as tiny pits or bright spots that persist no matter how many additional polishing passes are applied. For this reason, mirror-polished cavities are typically specified in a premium, pre-hardened optical or mirror-grade steel rather than a standard commodity tool steel grade.
Steel supplier certification and batch consistency also matter more for mirror-finish work than for most other mold applications, since even two bars of nominally the same steel grade can differ slightly in cleanliness depending on the specific production batch and melting process used by the mill. Mold shops that regularly produce optical-grade or high-cosmetic-grade tooling often develop a preference for specific steel suppliers and grades with a proven track record of consistent polishability, rather than treating all sources of a given grade as interchangeable, precisely because an unexpected batch of steel with poor polishability can derail a project schedule that assumed a straightforward, predictable polishing timeline.
Workshop Conditions and Contamination Control
Mirror polishing is unusually sensitive to environmental contamination compared with most other mold finishing operations, since a single airborne dust particle or stray abrasive grain can undo minutes or hours of careful fine-stage work. Many mold shops perform final diamond paste polishing stages in a dedicated clean area separated from grinding, EDM, and general machining operations, where airborne dust and coolant mist from other processes are far less likely to settle onto a partially finished mirror surface.
Hand cleanliness and cross-contamination control matter just as much as room conditions. Polishers typically wash hands and change gloves between grit stages, use separate storage containers for each diamond paste concentration, and avoid setting a partially polished mold surface down on any bench or fixture that may carry residual coarse abrasive from an earlier operation. Temperature and humidity control also play a supporting role, since a polisher’s hands can transfer oils and moisture to a bare steel surface between stages, and inconsistent handling in this respect can occasionally contribute to uneven staining or corrosion spotting on non-stainless mold steels if a surface sits exposed for an extended period between polishing sessions.
Tip: For mirror-finished cavities in non-stainless tool steel, apply a light rust-preventive coating whenever polishing work will pause for more than a day, and always confirm the coating is fully compatible with the diamond paste and cleaning solvents used in the next polishing session to avoid contamination.
Common Polishing Defects and Troubleshooting
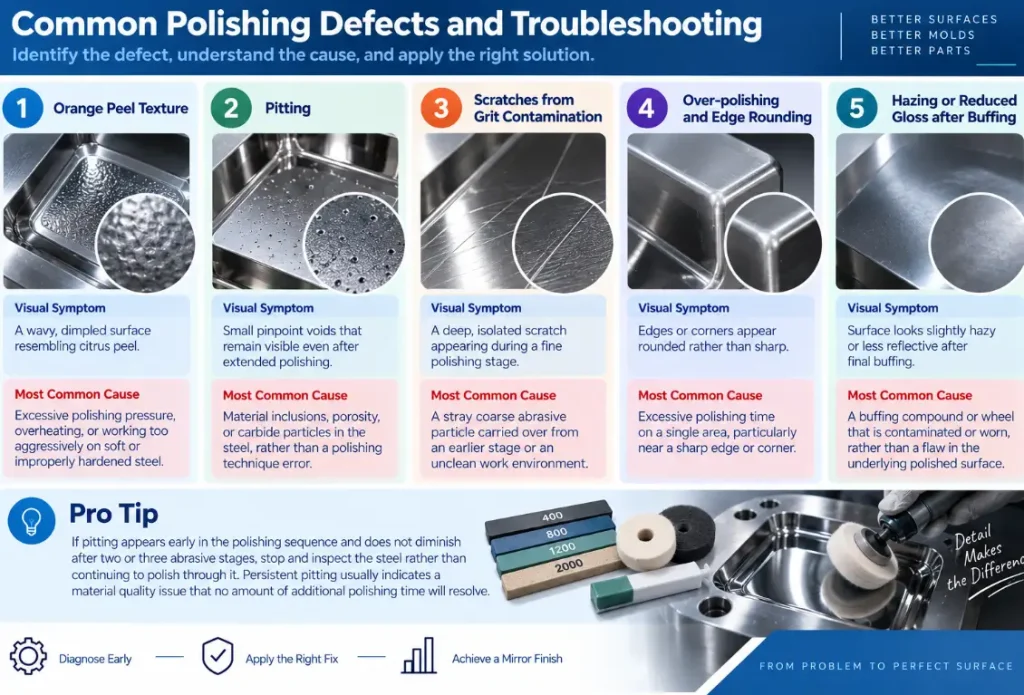
Even with a skilled polisher and a correct abrasive progression, mirror polishing can encounter defect patterns that require diagnosis and correction before the surface can advance to the next stage. Because each successive polishing stage builds directly on the quality of the one before it, an undiagnosed defect at an early stage tends to compound rather than disappear as polishing continues, making early recognition of these patterns far more valuable than trying to polish through a problem in hopes it resolves itself.
- Orange peel texture — A wavy, dimpled surface resembling citrus peel usually results from excessive polishing pressure, overheating the surface, or working too aggressively on a soft or improperly hardened steel; correcting it typically requires backing up to a coarser stage and re-polishing with lighter pressure.
- Pitting — Small pinpoint voids that remain visible even after extended polishing are usually caused by material inclusions, porosity, or carbide particles in the steel rather than a polishing technique error, and may not be fully correctable without stock removal or, in severe cases, re-machining the cavity in cleaner material.
- Scratches from grit contamination — A deep, isolated scratch appearing during a fine polishing stage almost always indicates a stray coarse abrasive particle carried over from an earlier stage or an unclean work environment.
- Over-polishing and edge rounding — Excessive polishing time on a single area, particularly near a sharp edge or corner, can round off a feature that was meant to remain sharp, altering the part’s dimensional or cosmetic intent.
- Hazing or reduced gloss after buffing — A surface that looked correct under diamond paste but appears slightly hazy after final buffing often indicates a buffing compound or wheel that is contaminated or worn, rather than a flaw in the underlying polished surface.
Tip: If pitting appears early in the polishing sequence and does not diminish after two or three abrasive stages, stop and inspect the steel rather than continuing to polish through it. Persistent pitting usually indicates a material quality issue that no amount of additional polishing time will resolve.
Measuring and Verifying Mirror Polish Quality
Because mirror polish quality is ultimately about how a surface interacts with light, verification methods combine quantitative roughness measurement with visual and optical inspection. A contact or non-contact profilometer measures surface roughness in Ra or Rz values, providing an objective number that can be compared against SPI or customer specification targets, while a gloss meter measures specular reflectance at a specified angle to quantify how mirror-like the surface actually appears.
Visual inspection under strong, raking directional light remains an essential complement to instrument measurement, since a profilometer trace along a single line cannot capture an isolated defect such as a pit or scratch located outside its measurement path. Skilled polishers and quality inspectors typically examine a mirror-polished cavity under multiple light angles and, for optical applications, may also project a grid or test pattern through a sample molded part to check for any distortion introduced by residual surface irregularity.
Acceptance criteria for a mirror-polished cavity should ideally be agreed upon before polishing work begins rather than negotiated after the fact, since “mirror finish” alone is a subjective description that different observers may interpret differently. Specifying a target SPI grade, a maximum acceptable Ra value, and, where relevant, a minimum gloss meter reading at a defined measurement angle gives both the polisher and the customer an objective basis for sign-off, reducing the risk of a dispute over whether a finished surface actually meets the intended requirement.
Tip: For optical or lens cavities, request a first-shot sample part molded and inspected under actual production lighting conditions before final mold approval, rather than relying solely on cavity surface measurements — some optical defects are only visible once light has actually passed through a molded part.
Cost and Lead Time Considerations for Mirror Polishing
Mirror polishing is one of the most labor-intensive operations in mold manufacturing because it depends almost entirely on skilled manual work rather than machine cycle time. Cost is driven primarily by surface area requiring polish, the complexity and accessibility of the cavity geometry, the target SPI grade, and the condition and polishability of the base steel.
| Cost Driver | Effect on Cost and Lead Time |
|---|---|
| Surface area requiring polish | Larger polished areas require proportionally more labor hours |
| Target SPI grade | Each step toward SPI A-1 significantly increases polishing time |
| Cavity geometry complexity | Deep pockets, tight corners, and complex contours slow manual access |
| Base steel cleanliness | Steel with inclusions or porosity requires extra correction time or rework |
| Prior surface condition | A poorly finished EDM or grinding stage adds extra stoning time before polishing can begin |
| Polisher skill level required | Optical-grade SPI A-1 work requires senior polishers, increasing labor cost |
Because polishing cost scales so directly with labor hours rather than machine time, the single most effective way to control mirror polishing cost is ensuring the surface entering the polishing stage is already as clean and well-prepared as possible. A cavity that was carefully finish-ground or given a fine EDM finishing pass before polishing begins requires meaningfully less stoning and coarse polishing time than one left with heavy tool marks from a rushed prior operation.
Mold maintenance planning should also account for the fact that a mirror-polished surface is not a permanent, one-time investment. Repeated molding cycles, occasional mold cleaning with abrasive materials, and general wear can gradually dull a high-gloss surface over an extended production run, and periodic re-polishing is a normal part of mold maintenance for cavities running very high shot counts or abrasive-filled resins. Building an expectation of occasional touch-up polishing into a mold’s maintenance schedule, rather than treating any loss of gloss as an unexpected failure, helps set realistic expectations for how long a given finish level will hold up in production.

Frequently Asked Questions About Mirror Polishing for Injection Molds
What is the difference between SPI A-1, A-2, and A-3 finish grades?
All three grades fall within the SPI A category, meaning they are achieved through diamond buff polishing rather than stone or sandpaper finishing, but they differ in the final diamond paste grit used to complete the polish. SPI A-1 uses a 1 micron diamond buff and achieves the finest, most mirror-like finish with surface roughness typically below 0.012 micrometers Ra, SPI A-2 uses a 3 micron buff for a slightly less refined but still high-gloss result, and SPI A-3 uses a 6 micron buff for a general high-gloss finish that requires less polishing time than the two finer grades.
Why can’t a mirror finish be achieved by skipping directly to fine diamond paste?
Each polishing stage is only capable of removing scratches that are shallower than the abrasive particle size being used, so a fine diamond paste cannot remove the deeper scratch pattern left by a coarser stone or grinding operation. Attempting to skip steps typically results in a surface that looks glossy under casual inspection but still shows underlying scratch patterns under strong raking light, which is why the sequential progression through each grit level is necessary rather than optional.
Why does mold steel selection matter so much for mirror polishing?
Mirror polishability depends heavily on the cleanliness of the steel’s microstructure, meaning the absence of hard carbide inclusions, porosity, and other microscopic defects, rather than hardness alone. A steel with inconsistent inclusions will polish unevenly and tend to develop pitting that persists no matter how many additional polishing passes are applied, which is why premium optical or mirror-grade steels such as NAK80 or S136 are typically specified for cavities requiring SPI A-1 finish rather than standard commodity tool steel grades.
Can mirror polishing correct pitting or porosity in the mold steel?
Generally, no. Pitting caused by material inclusions or porosity originates below the immediate surface, so continued polishing only removes surrounding material without eliminating the underlying defect, and in some cases can make the pit appear more pronounced by removing the surrounding steel down to its level. When pitting persists across multiple polishing stages without diminishing, it usually indicates a material quality issue that requires either accepting a lower finish grade, localized stock removal and re-polishing, or, in severe cases, re-machining the affected area in cleaner steel.
How does mirror polishing affect part ejection and cycle time?
A highly polished cavity surface reduces mechanical friction between the molded part and the mold steel during ejection, which is particularly beneficial for parts with deep draws, thin walls, or textured undercuts that would otherwise be prone to sticking or scuffing on a rougher surface. For certain resins and geometries, this reduced friction can allow more consistent part release at a lower ejection force, which in some cases contributes to a modest reduction in cycle time compared with an unpolished or lightly finished cavity surface.
How is mirror polish quality verified beyond a visual check?
Surface roughness is measured objectively using a contact or non-contact profilometer, which produces a quantitative Ra or Rz value that can be compared against SPI or customer specification targets, while a gloss meter measures specular reflectance at a defined angle to quantify how mirror-like the surface actually is. Visual inspection under strong raking directional light remains an important complement to these instruments, since a profilometer trace along a single line can miss an isolated defect such as a pit or scratch located outside its measurement path.